Saturday, June 29, 2013

Front LH torque box and rocker removal

This week I was able to make a lot of progress on removing the drivers side front torque box and about 80% of the outer rocker panel.  It was only 80% because at the end of the day I wanted to be able to see more progress than just a bunch of holes I drilled out, so I cut the outer rocker panel about an inch forward of the edge of the B-pillar.

side view of the outer rocker removed

front torque box was also removed with the rocker panel

The kick panel and firewall will also need to be replaced, but I'm leaving them in for a rough guide to replace the inner/outer rocker panels and torque box.


LH side of the floor is removed.  The frame support is next to be removed.


The rear floor and rear seat platform were removed.  Looks like swiss cheese!
I realized after all of this that I'll have to cut out the rear torque box  to make room for the inner rocker panel.


Sunday, June 16, 2013

Removing the LH floor

With the door braces installed it is now time to remove the left hand (LH) front torque box, outer rocker panel, and the LH floor.  

Here's the old rusty torque box.

And what is left of the front floor board. 

 Here are the new parts laid out next to the car where they will soon be installed.

These parts have a little surface rust on them so I'll have to treat them before installing them.

Here is the floor and seat bracket after I've cut them out.

Door braces


After getting all the suspension components off I decided to strengthen up the car using door braces before I start chopping up the floor and rocker panels.  I wanted to make sure the frame stayed straight.
I saw some really good blogs out there talking about making their own convertible door braces for this same purpose, so I decided to follow suit.
I built them in place from 16 gauge 1" square stock.

I started off with 1/8th" plate mounted at the A-pillar door hinge bracket mounts.


Next I tacked on the basic outside frame components.


Here is a picture of the cross-members I welded into the door brace.

Like everything else on this car, the door latch screws were fused to the threads holding them in.  I even tried the impact drive on them with no luck.  Since I was going to replace these B-pillars anyway I figured it wouldn't hurt to simply weld the frame right to them.  Plus this provides more structural support with two attach points as opposed to a single one.


And here is the passenger side door brace I finished as well.


Months after the move

Since I started this blog back in August I got a new job back in Northern Utah where I grew up so I moved both cars and the garage full of associated parts back to Utah where this whole project first started.  At this time, the coupe was basically just a rolling chassis that also served as storage for a lot of the miscellaneous parts I had.  Below is a picture I took on our trip from Houston, TX to Syracuse, UT....yes, this is going to be a big project.


In the past few months I've had a lot more time to work on this car so I'll quickly update this blog with what I've done to the coupe since it was a rolling chassis/storage unit.

First I installed the front and rear parts of the rotisserie that bolt onto the front and rear frame rails.  You can see the front rotisserie mounted to the front frame rail in the next picture.  You can also see that I removed the front suspension in this picture as well.


Every once in awhile my kids would come out to see why I was making so much noise, so I let them help me  as long as they could stay interested.


After the front end components were removed I focused on the rear end and leaf springs.  Everything went as well as you can expect on a 43 year old car.  I had to cut most of the bolts off with my angle grinder.  However the front leaf spring bolts were a special treat.  If you've ever had to remove old leaf springs from a mustang you'll know what I'm talking about. The first (blurry) picture below shows how the bolt that goes through the bushing of the leaf spring also goes through the rear frame rail.  After more than 40 years of salt and water this bolt and the metal sleeve attached to the rubber bushing become 1 piece.  Since the metal sleeve is wider than the hole in the frame and the bracket you can't simply cut off the bolt head and pound the bolt out the other side.  This is what I was trying with this first picture.


In the end I busted out the oxy-acetylene torch and melted/burned the rubber bushing out so I could get to the bolt/sleeve and cut that out.  The blackened picture below shows the aftermath after catching this foul rubber on fire.


This picture below shows the progress after about 1.5 hours of cursing and trying to avoid getting flaming,  boiling rubber from splashing on me.  Good times!

The progress after about 1.5 hours of cursing


Master Plan #3

Soon after tearing into the new convertible that I had bought I found that the front frame and everything attached to it was completely rusted out.  Nothing I could have replaced, forward of the dash, could have been welded to anything that also didn't need to be replaced.  This was the demise of Master Plan #1. "simply replace all rusty parts with good aftermarket parts".  (still looking for the old pictures that show the extent of the rust)

In my over excited youth, I decided to cut off the front of my convertible, from mid-rocker panel forward, and replace it with the front end of a 1967 coupe parts car that I bought for $150.  I figured this was a good plan, however several years of school and family time left these cut up pieces sitting outside.  They didn't rust much more than they already were, but by the time I got a house with a big enough garage to start working on the car again, I realized that the coupe front end was bent out of square.  This started looking like as big of a project as replacing all the old rusty part on the original convertible, so I scrapped the old coupe front end.  And here ends Master Plan #2, "chop two rusty cars in half to make one slightly less rusty car, THEN replace all the rusty parts with good ones".  (I know I have pictures of this franken-stang somewhere, but again, I'm still looking for them.  I'll post them once I track them down.)

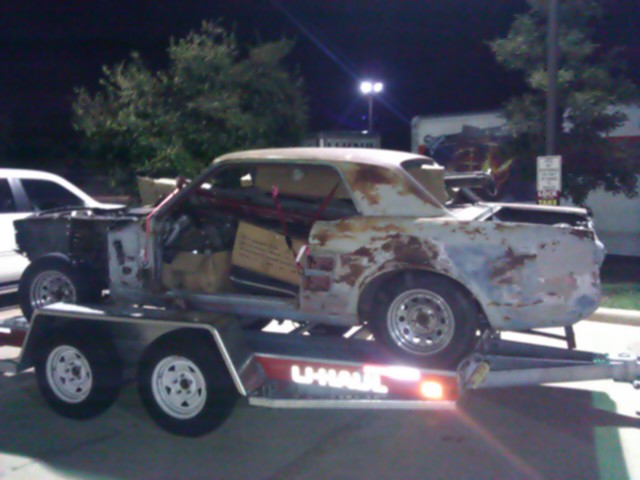
Now to my current plan, Master Plan #3.  I found another '67 coupe parts car with less rust than the one I cut in half and managed to pick it up for $100.  Of course it has rust.  A lot. But the frame is in good shape and from measurements it appears to be square.  So now I know that it would at least drive down the road straight compared to Master Plan #2.  I still also have rear end of the convertible along with the dash and convertible windshield frame and front cowl.  This newest coupe will now provide the base frame and act as a jig for my convertible parts.  I'm starting out by getting a solid frame under the whole thing before I start replacing the rust parts with new ones.  I need to replace the old rusty LH front torque box and add one to the LH side.  Then I'll replace the old outer rockers and add the inner rocker panels that stiffen up the convertible frame.  At this time I'll also replace the rear torque boxes with the proper convertible ones.  From there I'll start adding all the extra convertible stiffening pieces along the floor pans and behind the back seat.  Once I have a solid stiff frame I'll chop the top off and put the convertible windshield frame on.

I know it's possible to replace the inner/outer rockers and the floor pans on a convertible without compromising the square of the frame, but I decided I might as well keep the roof on the coupe for a little added structural stability until I get the convertible frame finished.

I've taken a mental inventory list on the car and figured that it will be mostly new aftermarket sheet metal with a few key frame members that will belong to the coupe with an equal amount of parts from the original convertible.  The good this is that the convertible sheet metal that bolts on and the convertible top is still in decent shape so most of the car should be from the original convertible GT that I bought over 13 years ago.