
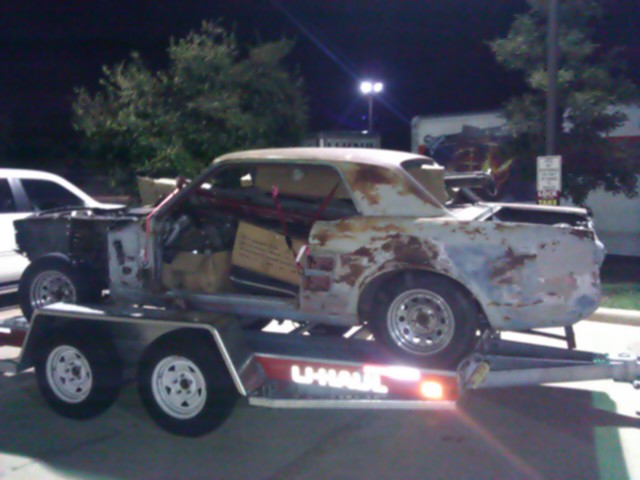
Since I started this blog back in August I got a new job back in Northern Utah where I grew up so I moved both cars and the garage full of associated parts back to Utah where this whole project first started. At this time, the coupe was basically just a rolling chassis that also served as storage for a lot of the miscellaneous parts I had. Below is a picture I took on our trip from Houston, TX to Syracuse, UT....yes, this is going to be a big project.
In the past few months I've had a lot more time to work on this car so I'll quickly update this blog with what I've done to the coupe since it was a rolling chassis/storage unit.
First I installed the front and rear parts of the rotisserie that bolt onto the front and rear frame rails. You can see the front rotisserie mounted to the front frame rail in the next picture. You can also see that I removed the front suspension in this picture as well.

Every once in awhile my kids would come out to see why I was making so much noise, so I let them help me as long as they could stay interested.

After the front end components were removed I focused on the rear end and leaf springs. Everything went as well as you can expect on a 43 year old car. I had to cut most of the bolts off with my angle grinder. However the front leaf spring bolts were a special treat. If you've ever had to remove old leaf springs from a mustang you'll know what I'm talking about. The first (blurry) picture below shows how the bolt that goes through the bushing of the leaf spring also goes through the rear frame rail. After more than 40 years of salt and water this bolt and the metal sleeve attached to the rubber bushing become 1 piece. Since the metal sleeve is wider than the hole in the frame and the bracket you can't simply cut off the bolt head and pound the bolt out the other side. This is what I was trying with this first picture.

In the end I busted out the oxy-acetylene torch and melted/burned the rubber bushing out so I could get to the bolt/sleeve and cut that out. The blackened picture below shows the aftermath after catching this foul rubber on fire.

This picture below shows the progress after about 1.5 hours of cursing and trying to avoid getting flaming, boiling rubber from splashing on me. Good times!
 |
| The progress after about 1.5 hours of cursing |
No comments:
Post a Comment